 Camera
Creates a camera object that can be used for multiple purposes:
rendering geometry using a Render node
projecting points from 2D space onto 3D geometry using a ProjectScreenPoints node
for FacialDetection and FacialAnnotation
Output
CameraCamera object
Parameters
- Width
camera width in pixels
- Height
camera height in pixels
Tip
The camera resolution can be overridden in other nodes that use a camera as an input.
- Projection Type
- Perspective
perspective projection
- Orthographic
orthographic projection
- Field of View
vertical field of view measured in degrees
- Near Plane
distance to the near clipping plane
- Far Plane
distance to the far clipping plane
- Principal Point X
horizontal offset of the principal point
- Principal Point Y
vertical offset of the principal point
- Copy from Main Camera
copies camera parameters, position, and orientation from the main viewport camera
- Import
imports camera from a file. The following formats are supported:
- JSON format
to import cameras exported from Wrap
- Agisoft Metashape (XML format)
to import cameras from Agisoft Metashape
- Reality Capture (XMP, CSV and FBX formats)
to import cameras from Reality Capture
- Export
exports camera to a JSON file
Import a Camera from Photogrammetry Software
The Camera node lets you import cameras form photogrammetry software such as Agisoft Metashape and Reality Capture.
Agisoft Metashape
With Agisoft Metashape, you can export camera parameters into an XML file.
Export Cameras into an XML File
After the cameras are calibrated you can go to Chunk > Export > Export Cameras and select the XML format.
Export Undistorted Photos
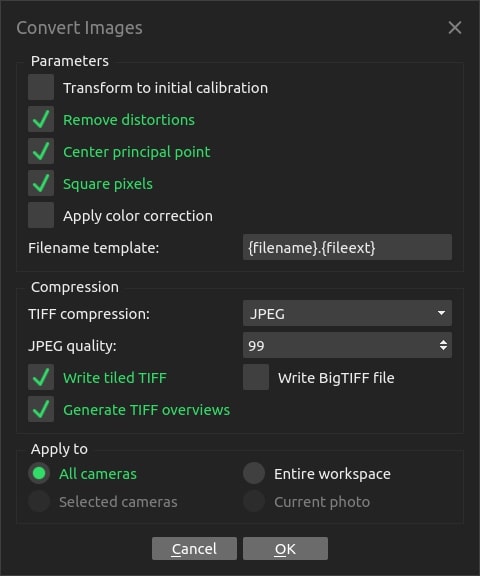
Please note that the camera views won’t match the original photos. In order for them to match, you need to export undistorted photos from Agisoft. You can do that by using Chunk > Export > Convert Images. Please make sure that the Center principal point and Remove distortions options are checked.
Please check a complete list of export settings below.
Note
Please pay attention to the Center principal point option. If you want to export without Center Principal Point, then when importing into Wrap, you will need to check the Import Principal Point.
Import a Camera into Wrap
To import a camera into Wrap, please click the Import button, choose Agisoft Metashape (xml) format, and select a file.
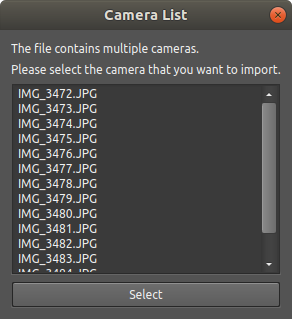
Agisoft Metashape exports all the cameras into a single XML file. In the Camera List dialog, you can select a specific camera for import.
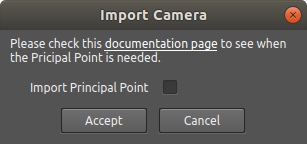
You need to specify whether you want to Import Principal Point. This must be checked if you exported undistorted images without a Center Principal Point.
Reality Capture
RealityCapture supports three formats to export cameras: XMP, CSV and FBX.
Export Cameras into an XMP file
Wrap can only import XMP files exported from Reality Capture version 1.0.3.9696 and higher.
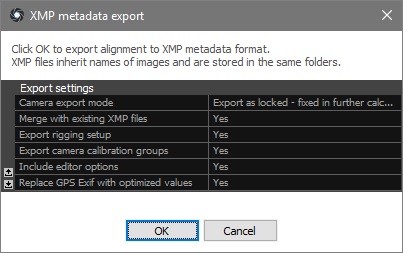
In order to export cameras into Metadata (xmp) format you need to select Alignment > Metadata (XMP). Please make sure that you are using the same settings as listed below.
Note
Please make sure that the Coordinate system parameter is set to Same as XMP when exporting the mesh. If you export a mesh with different options, you can use the CSV format for camera export.
Export Cameras into a CSV file
Wrap can only import CSV files exported from Reality Capture version 1.0.3.9696 and higher.
To export cameras into internal / external camera parameters (csv), please select Alignment > Registration > internal / external camera parameters. A settings window will open as shown below.
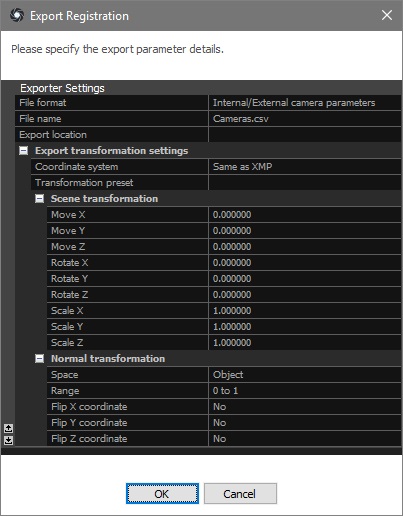
Note
Please make sure that the Coordinate system parameter is the same as the Coordinate system option that was used when exporting the mesh.
Export Cameras into a FBX file
Wrap can import FBX from all versions of Reality Capture
To export cameras into RealityCapture FBX (fbx), please select Model/Mesh > Autodesk’s file format. A settings window will open as shown below.
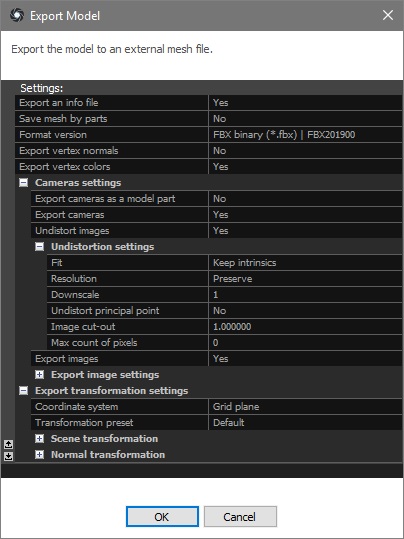
Note
Please make sure that Undistortion settings must be the same as when exporting Undistorted Photos. And the Coordinate system parameter is the same as the Coordinate system option that was used when exporting the mesh.
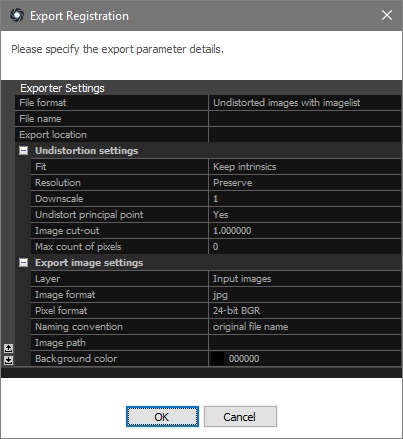
Export Undistorted Photos
If you want a perfect match between the exported cameras and photos inside Wrap, you need to export the photos from Reality Capture in undistorted format. You can do that using Alignment > Registration > Undistorted images with imagelist.
Note
For Reality Capture version 1.0.3.9696 and higher please make sure that the Resolution parameter value corresponds to the resolution of the original image. The Fit parameter must be is Keep intrinsics, it preserves the camera calibration parameters. And please check the Undistort principal point option, otherwise, you will need to specify the Import Principal Point option when loading cameras into Wrap (relevant for CSV and XMP).
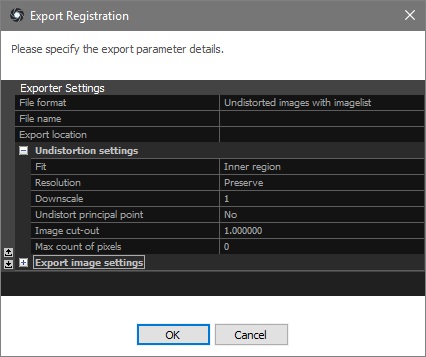
Note
For Reality Capture version lower than 1.0.3.9696 (Only relevant for FBX) please make sure that the Resolution parameter value corresponds to the resolution of the original image. The Fit parameter must be is Inner region.
Import a Camera into Wrap
To import a camera into Wrap please click the Import button, specify the corresponding Reality Capture file format, and select a file.
Unfortunately, Reality Capture doesn’t export information about image resolution in CSV and XMP, so the user should specify the resolution of the original images in the following dialog. Also, specify Import Principal Point if you exported undistorted images without the Undistort principal point option.
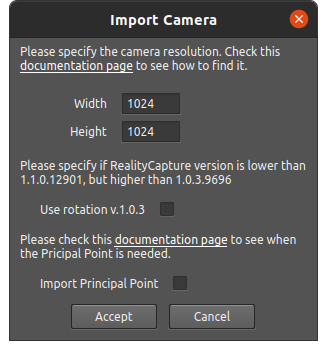
Note
Please make sure that if your RealityCapture version is lower than 1.1.0.12901, but higher than 1.0.3.9696, you must specify Use rotation v.1.0.3 when importing CSV.
While each XMP file stores exactly one camera, the CSV format stores all the cameras in a single file. In the case of CSV, a user will need to select a specific camera from the Camera List dialog below.
Use FBX format to import from any version of RealityCapture (Including version less than 1.0.3.9696). It stores in itself all the necessary settings, and you only need to select a specific camera when importing.